
My friend Grace asked me to create a stained glass halibut for her partner’s birthday. I made a trout before, but this funky looking fish was a new one for me. Having never seen a halibut before (besides on my plate), I started researching the fish and was quickly shocked by how HUGE they can be! Over 8 feet long and 5 feet wide is pretty nuts.
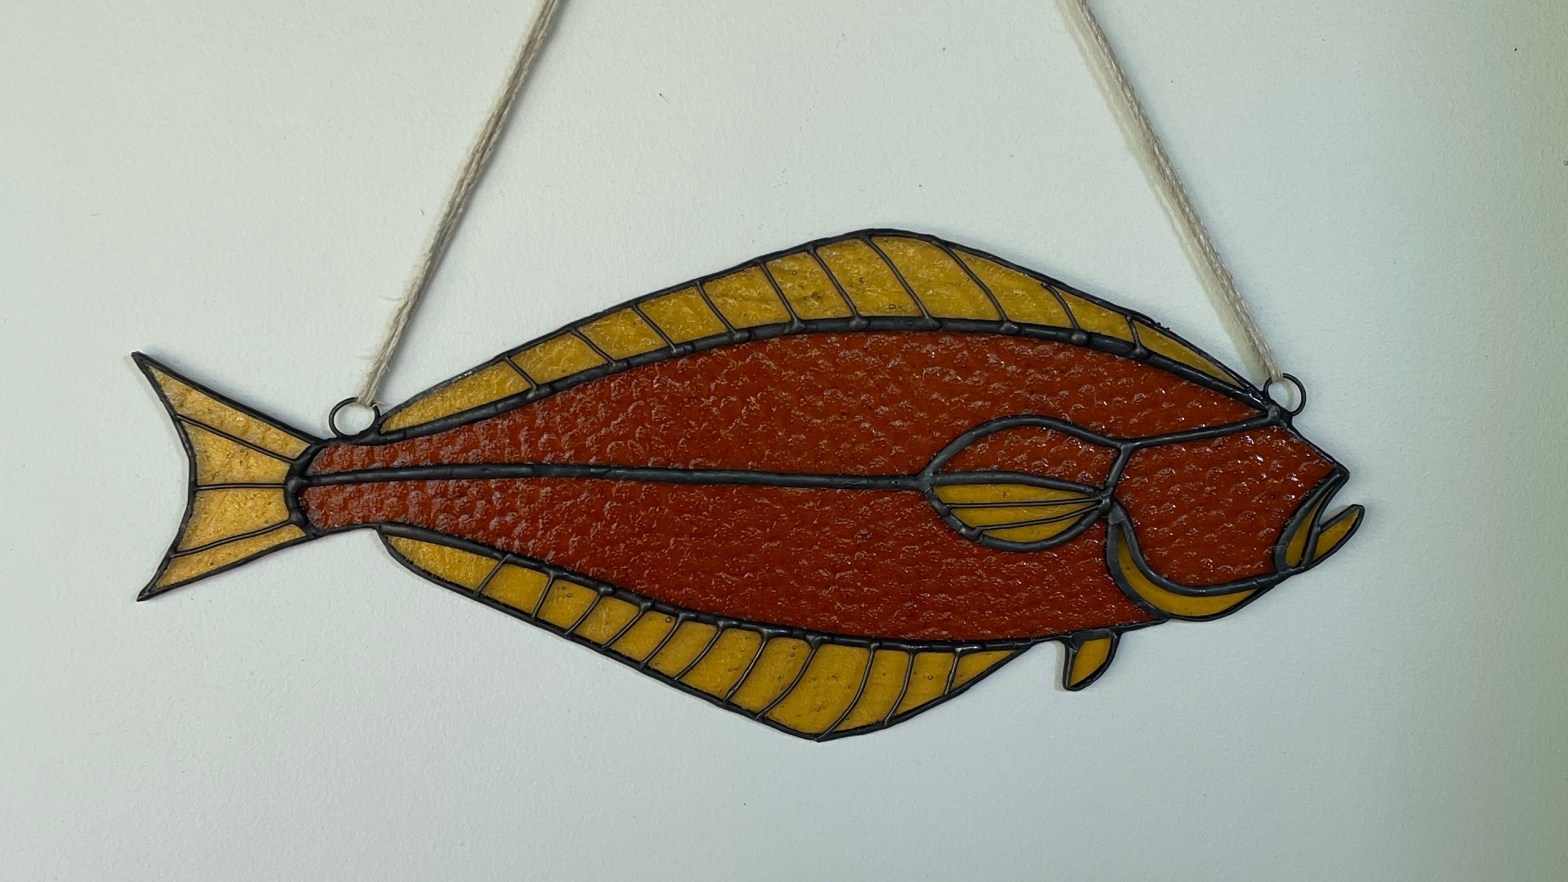
While having two eyes on one side of your head is pretty silly, I was more drawn to the fins, especially the spines and rays. I wondered how I could incorporate these features into the stained glass piece. My first thought was that I would paint them on, but once it came to soldering the piece, I knew wire work was the way to go.
In stained glass art, pre-tinned copper wire is often used to make jump rings or add structural support. But it can also be used to add decorative elements, giving your piece more texture and dimension. Pre-tinned copper wire is great because you can apply patina to it.
I hadn’t attempted decorative wire work in my stained glass art because I am rather sloppy with wire. I bet that someone who has a background in jewelry making or another related craft would have an easier time manipulating wire. For me, this is new.
The halibut posed a prime opportunity to try wire work for the first time, since the stakes were low: the wire didn’t have to be manipulated all that much. No curves, spirals, or delicate designs.
One by one, I cut the pieces to fit, soldering each end onto the piece. The process was actually pretty easy, and I ended up really loving how it turned out. When I look at the piece now, I can’t imagine it without these added elements. The three-dimensionality of the wire adds a really awesome texture to the piece, closely resembling the spines and rays of the halibut. Mission accomplished!
I am definitely going to attempt more wire work in the future. Knowing how well it turned out, I am going to keep it in mind as I develop designs for future projects.
